Getting started in robotics, without a robot
(Warning: lots of media, so might be better to view this in the browser)
How does one go from this...

to this first attempt at training a model?
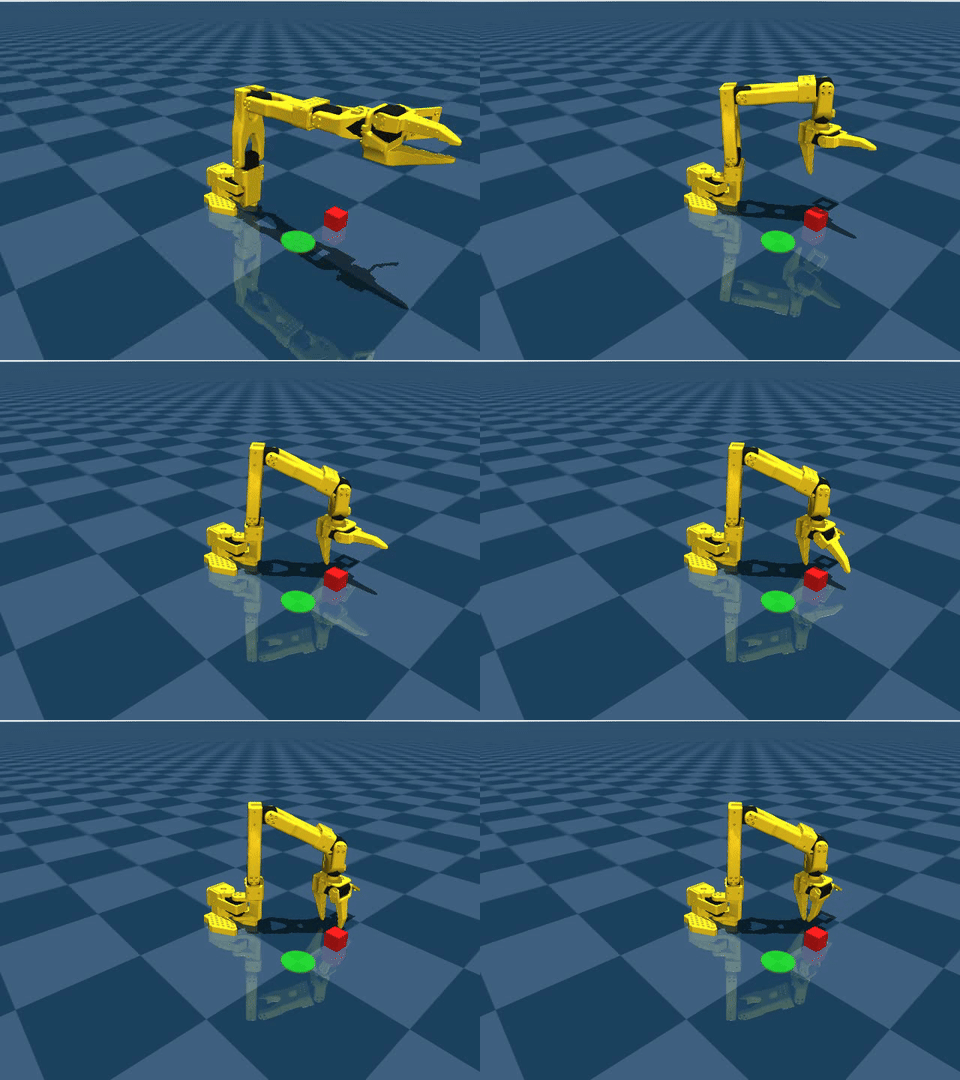
to this beautiful trajectory, 100% of the time?
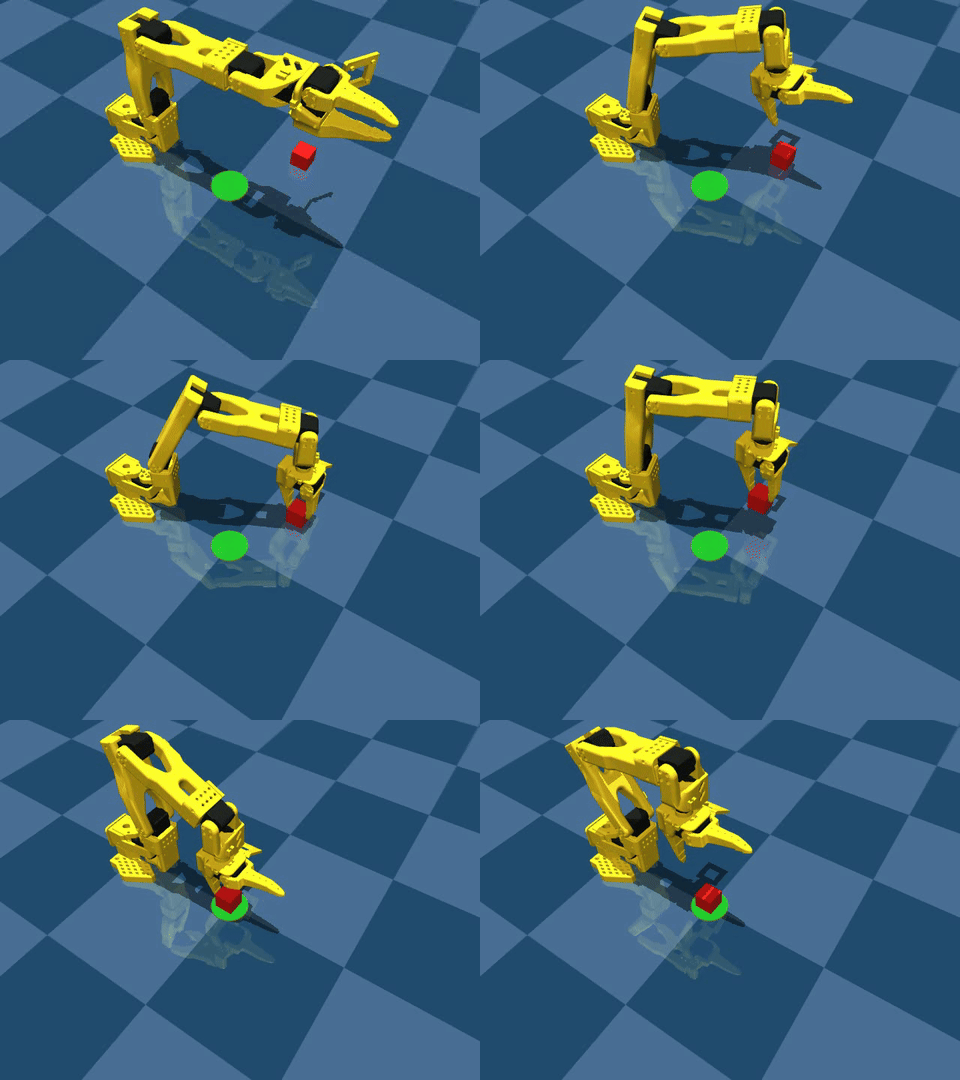
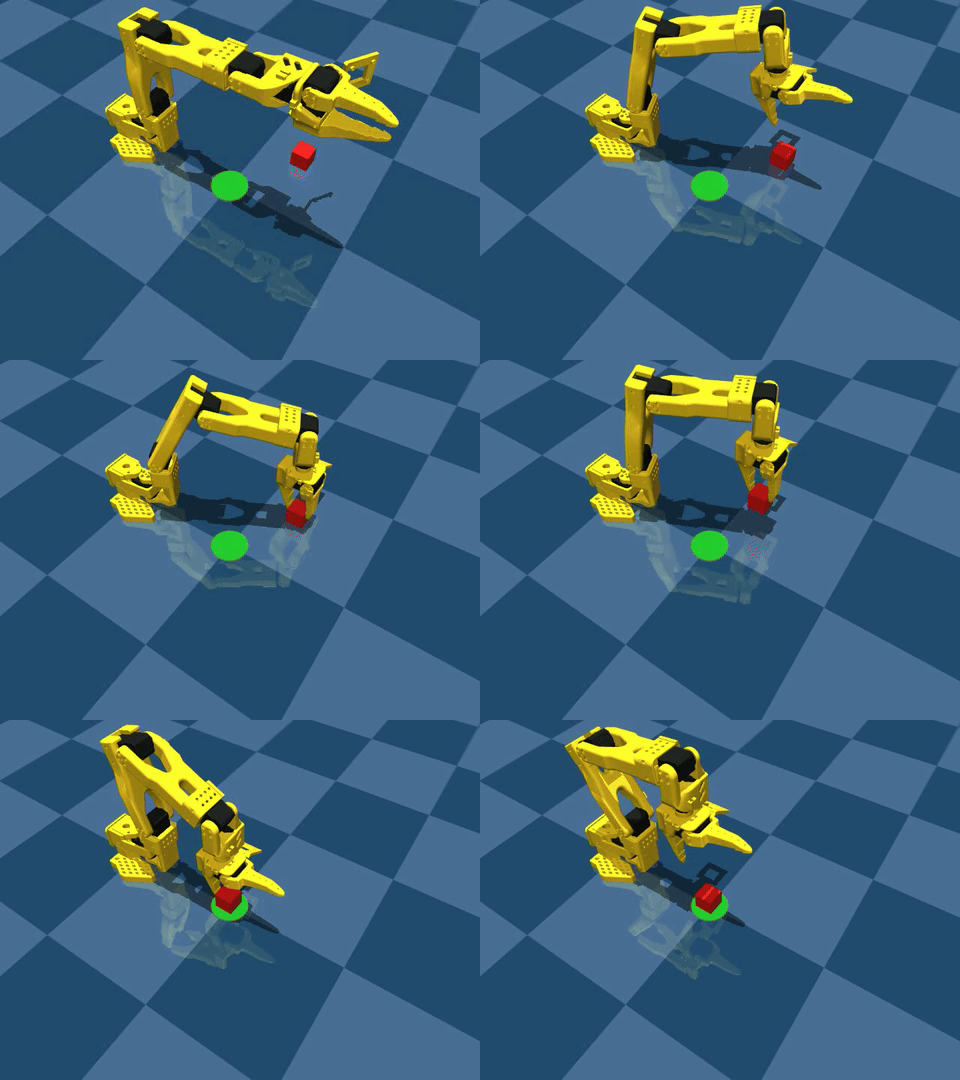
To clarify, that's not scripted. The arm is being controlled by an AI model called ACT, which sees the scene through virtual cameras and generates robot actions in an open-ended simulator.
My own little piece of machine intelligence. That's pretty cool.
Here's how I did it.
Setting up
My overall approach to this project was:
- Choose a simulator
- Pick a task for the robot to accomplish
- Collect data in sim for that task
- Train a model on that data
- Run the model on the task n times to measure performance of the model
- If improvement needed, repeat 3-5 with tweaked variables
Choosing a simulator
Why a simulator? Mainly to iterate quickly while I learned the basics. Plus it makes for a fun hook to this post.
After doing some research, DeepMind's MuJoCo was the best fit for me. It's lower fidelity than NVIDIA's Isaac Sim (requires a graphics card) and less complex than Gazebo, which made sense for my weak Macbook Air.
The key thing to understand about simulators is that they have simple Python interfaces for scripting scenes. Everything from the robot's movement to the scene itself is controlled by code. Side benefit: AI can help me out by writing code for me if I ever get stuck.
Choosing a robot
Usually, you want to match the robot to the task, not the other way around. But in my case, I wanted to get familiar with a common robot arm in the simulator. Specifically, the LeRobot SO101.
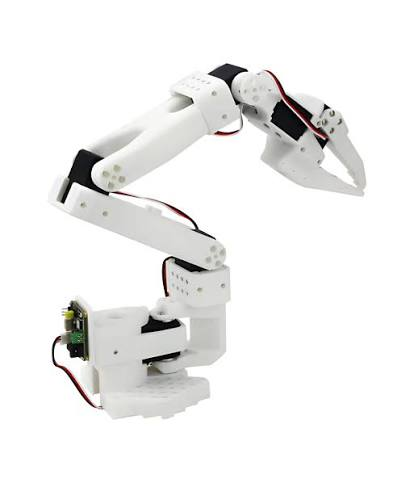
I wasn't going to virtually reconstruct this arm myself so I had to find the model files for the robot arm. Through trial and error I found that DeepMind already had a repo containing the model files called mujoco-menagerie... which makes sense, given that DeepMind developed MuJoCo in the first place. If only I had realized that before trying out crappy model files from random third party maintainers. See how it looks below.
Choosing the task
Next, I chose the task of pick-and-place. Why? Because it's simple and progress-able. There are only two objects needed in the scene besides the robot, and I could easily make the task harder by adding more objects, shrinking the target, etc.
I had no idea how well I could train a model for this on my measly MacBook Air, so I thought: the easier the better, and I'll increase difficulty later if it succeeds.
The setup was:
- A green target pad, always in the same location
- A red cube, positioned randomly within the robot's reach
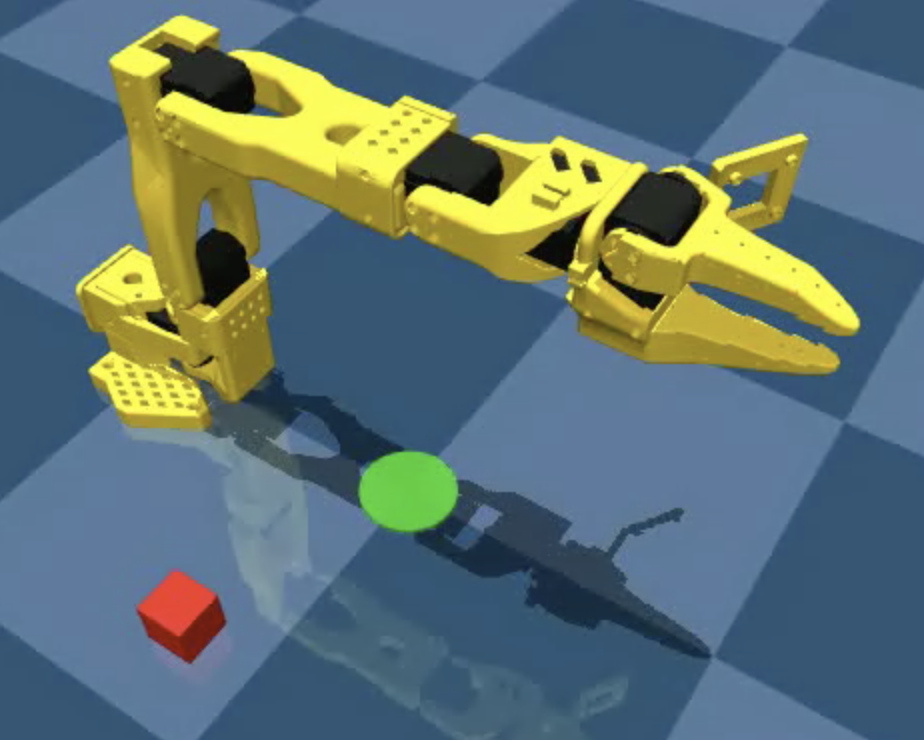
Part of the task is deciding how much input to give to the model, and for pick-and-place, the standard answer seemed to be
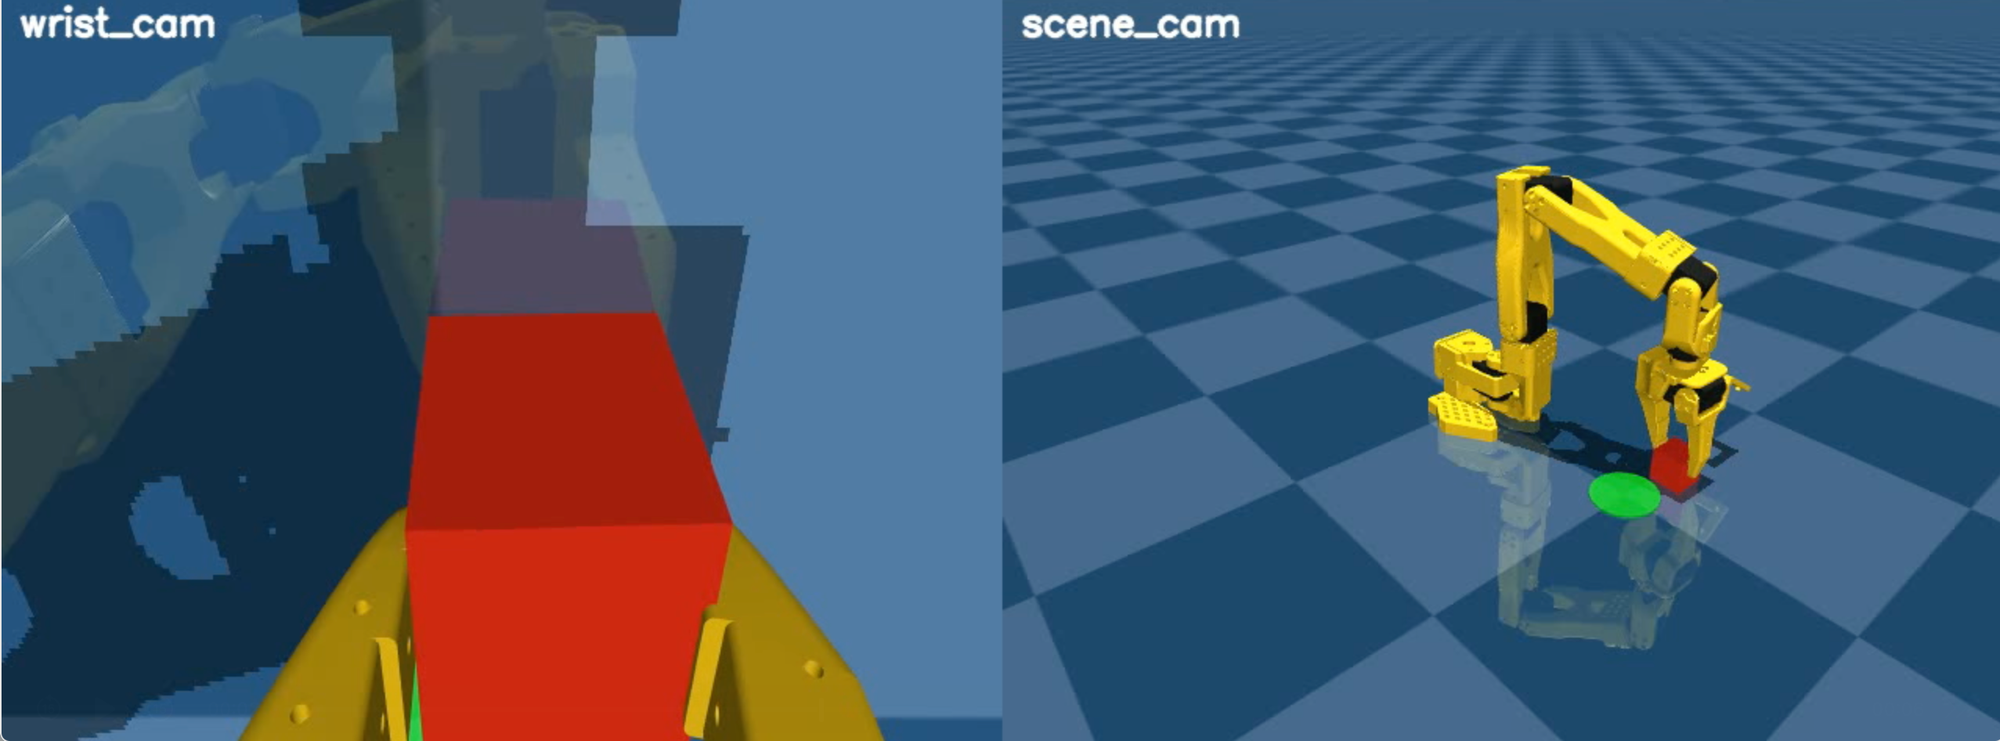
- A scene camera that could look at the entire workspace
- A wrist camera that could help the model make small adjustments as it approaches the object
Here's how the cameras capture a single frame:
Choosing the model
Once I decided on the task, I chose the model. After some research, I found that ACT was the best for my constraints. I didn't need the generality of SmolVLA for this specific task, and I wanted to train this model on my MacBook Air, so a tiny ~60M param model made sense.
ACT stands for 'Action Chunking Transformer'. Let's break that down.
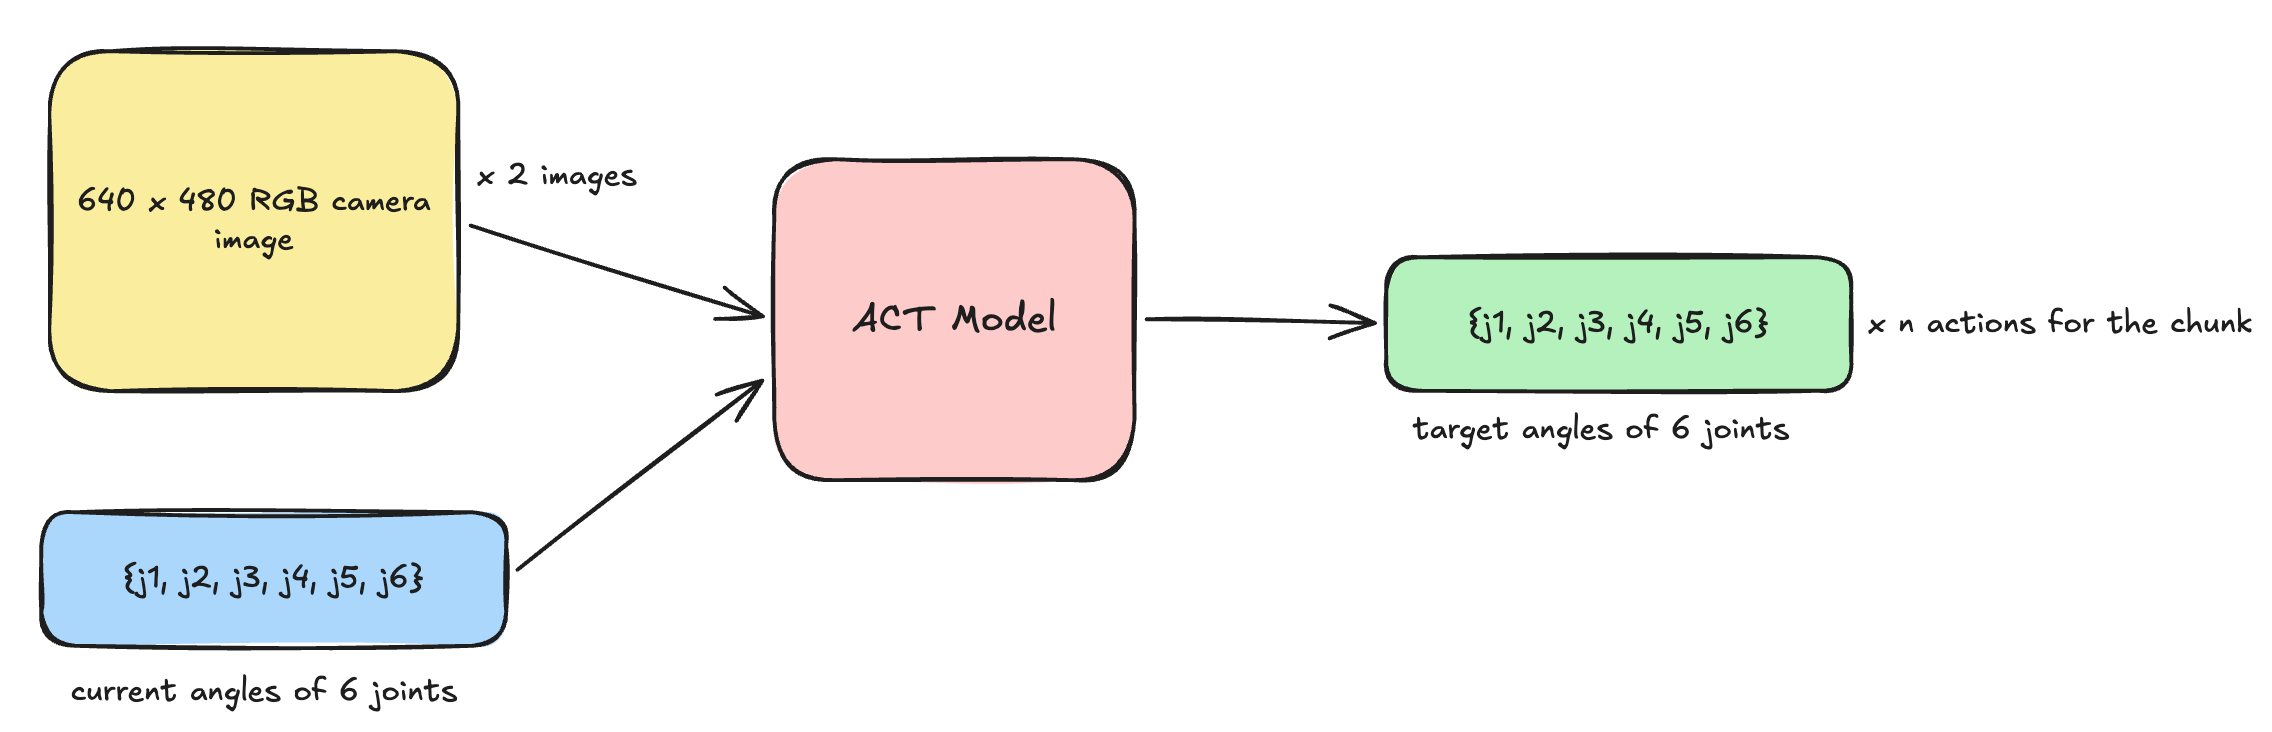
- "Action" means a set of target joint angles. The robot's motors are position-controlled, meaning that each joint's motor receives a single angle, then uses its onboard control loop to apply voltage until it reaches that angle. My robot has 6 joints, so that was 6 angles, or actions.
- "Action chunking" means that instead of predicting one action at a time, the ACT model predicts a set of consecutive actions. Why? Because it allows the model to reason about the relationships between different timesteps, instead of in the one-action-at-a-time case, where each timestep would be evaluated independently. Plus, when inference can't run at 30hz due to compute constraints, the robot can blindly follow a series of actions while the model computes the next set.
- And yes, "Transformer" refers to the same core architecture behind large language models today. Turns out that it works well for robotics too!
If that was too detail heavy, we can simplify it like this: the model would read images + joint angles, and predict the next chunk of target joint angles.
With my simulator (MuJoCo), robot (LeRobot SO101 arm), task (pick and place), and model (ACT) picked out, I was ready to start training.
Collecting Data
Next, I had to collect data to train the model. What does that data look like?
Looking back at the diagram above, the ACT model above is going to learn to associate camera images + current joint angles, with target joint angles.
ACT is trained through demonstrations, meaning we'd manually control the robot to do the task, and collect virtual camera images along the way. That way, we'd have a dataset of camera images + joint angles that result in a successful pick and place, making it easy to train an ACT model to predict the next target joint angles by simply looking ahead in the dataset.
This would be really fun in sim, because I can program a specific trajectory for the robot to follow, then replicate that 1000 times (across different cube positions) to create my dataset.
After getting familiar with how MuJoCo scripting and scene construction worked, I put some cameras on the scene and created my first attempt at programmed behavior for the task:
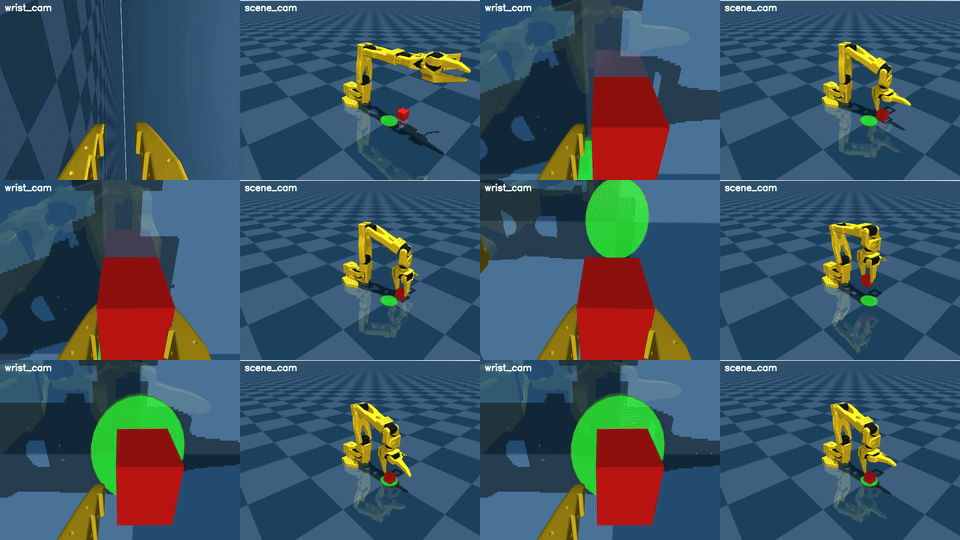
It was a staged trajectory:
- Move head over the cube
- Open gripper
- Reach down to cube
- Close gripper, grasping the cube
- Move head up
- Move head over target pad
- Move head down to target pad
- Open gripper, dropping the cube
But how do you actually generate this motion? I couldn't just say "Hey robot, go and pick up the red block in each scene and put it on the green target pad."
I needed to generate the numbers representing the ideal joint angle of the robot for every moment of time in the episode, such that the cube (wherever it was generated on the scene) was gripped, lifted, and placed onto the green pad.
Then, the virtual motor controllers (remember, this is a simulation of the full robot) would use those target values to apply force to the robot to reach those angles, which ideally results in a correct placement of the block.
The way to generate these sets of joint angles is inverse kinematics (IK).
A simple explanation of IK is that you choose a location for the head of the robot to move to, then use linear algebra to solve for the joint angles required for the head to be in that position. Then, to generate a trajectory for the whole robot, you generate a series of head positions, which IK uses to generate a series of target joint angles.
And we know what head positions the robot should be in, because in simulation, we have privileged information about the scene—namely, the exact location of the cube and target pad, and therefore, exactly where the head should move to in order to pick the cube up and place it.
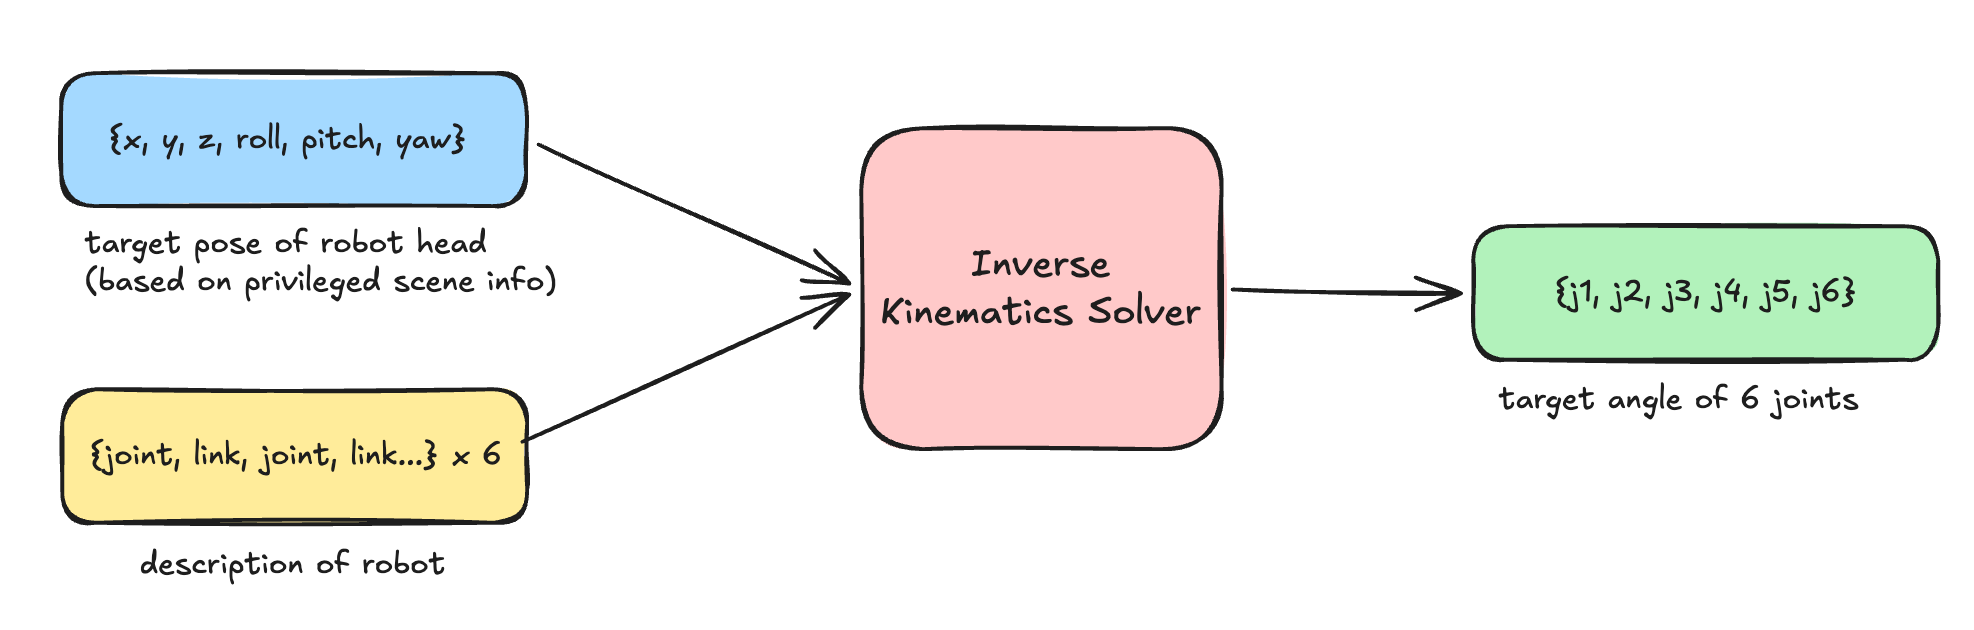
The outputs look pretty similar to the ACT diagram!
Now all we had to do to collect the dataset using IK was to turn the virtual cameras on, record the current joint angles, and run the simulated trajectory hundreds of times across different initial cube placements to capture the dataset: camera images + joint angles that result in a successfully placed cube.
Training The Model
It took 4 attempts to train the model until I was satisfied.
Each attempt had 4 phases:
- Generate a dataset
- Train the model
- Evaluate the model
- Analyze the results to generate a new hypothesis, then repeat
Evaluation meant running the newly trained model on the robot in 100 new pick-and-place setups, and mark it a pass if the cube landed completely within target pad, and a fail if any part of the cube landed off of the target pad.
Experiment #1: Baseline
The goal was to just get something working. Spoiler alert: This did not happen.
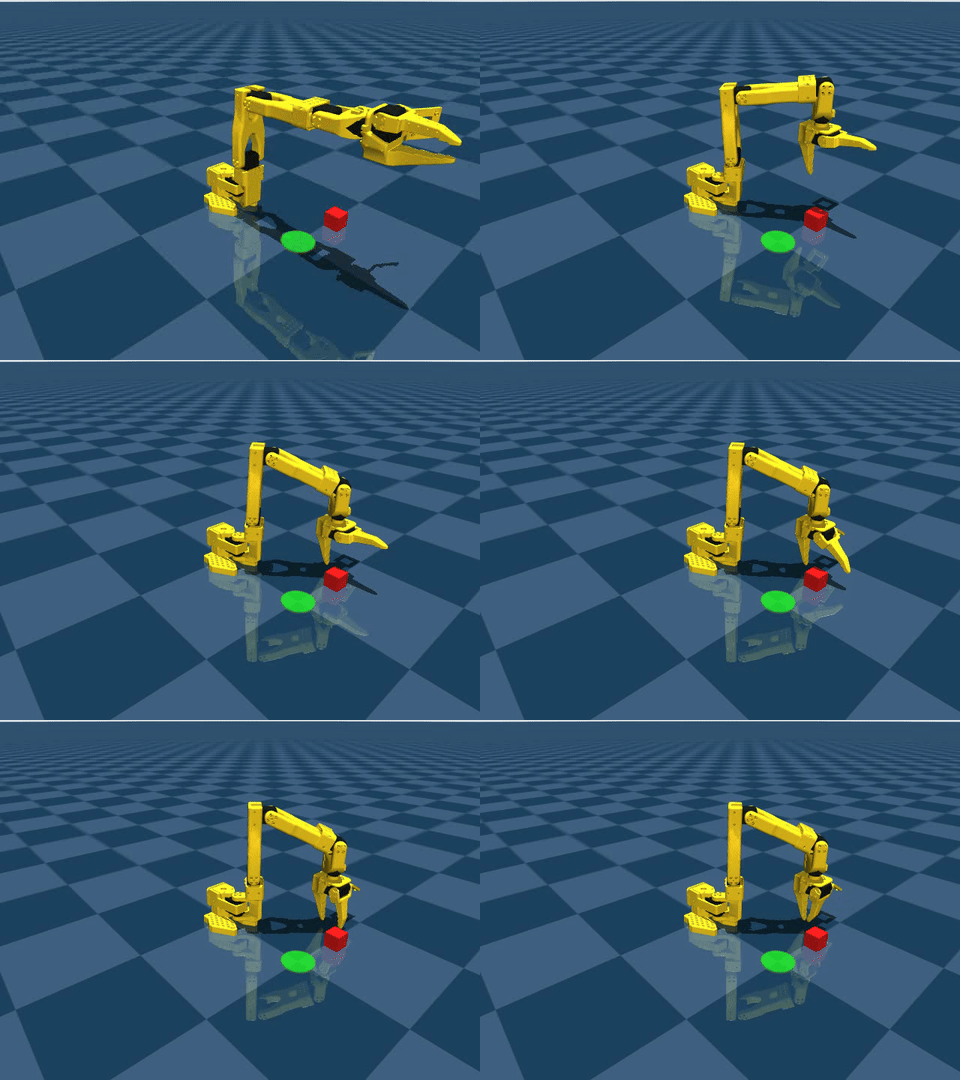
- Dataset: The first dataset had 300 episodes and followed the exact generation recipe from the section above.
- Training: 50k updates to the raw model with a small batch size of 2. Still, it took ~6.5 hours overnight to train the model on the puny Macbook Air.
- Evaluation: The failure rate was abysmal. Only 30% of the 100 eval episodes worked. This was lower than expected compared to other similar experiments I'd read about online.
- Analysis: Looking at the grasping misses like the one above, I initially thought that the scene camera had to be more 'overhead' so it could see depth better, but that didn't make sense—the dataset also had a wrist camera the model could use to check alignment with the cube. Despite that, I changed the camera for the next run anyways to be more top down.
The real issue was something the AI found: The dataset labels were offset from the actual observations, meaning that the ACT model was learning to take actions too late. This would explain why the model was causing the robot to overshoot and miss the cube. So I had to rerun the experiment
Experiment #2: The Real Baseline
The first baseline was a dud, but with the correct labels and slightly more overhead scene camera, I was hoping the exact same experiment would result in a better baseline. And it did!
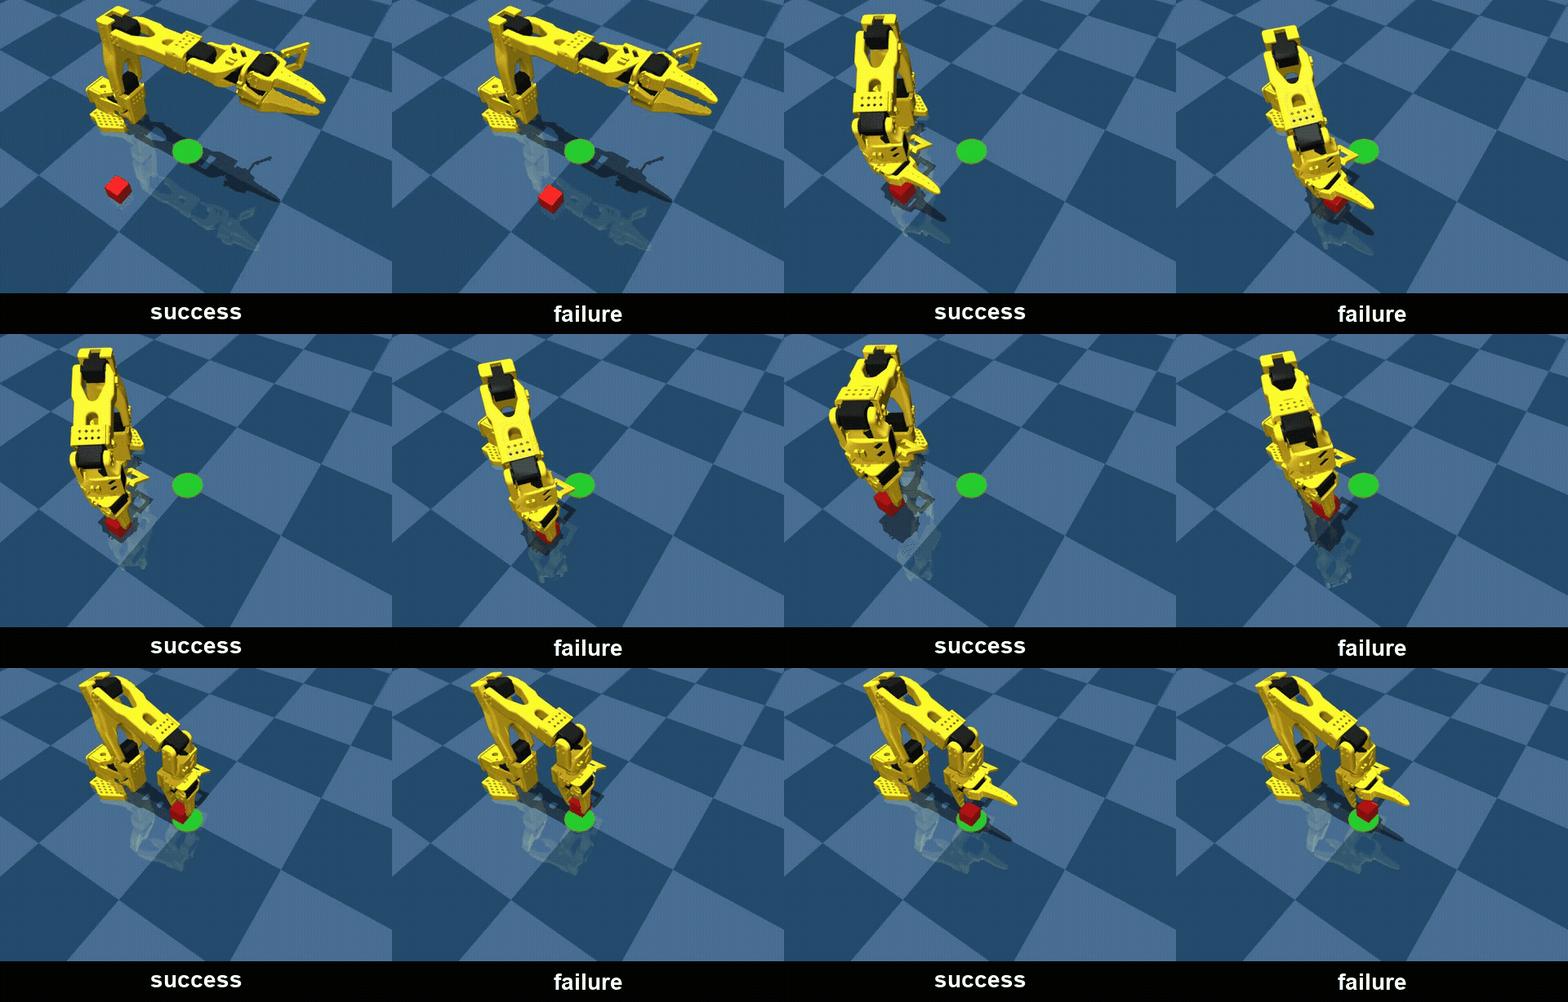
- Dataset: Same as #1, but with corrected labels.
- Training: Same as before—50k updates with batch size 2.
- Evaluation: 53/100 this time! Much better as a baseline. 53% would not pass on the factory floor, but this is what a baseline should look like.
- Analysis: You can see in the gif above that the failures were off by only a little bit. When I increased the target pad size by 10%, the success rate went up to 61%! Also, the loss for this trained model (aka a measure of how far off the model is from evaluating itself on the training data) was still quite high at 0.071. Both of these pointed to the idea that perhaps just more training could improve the outcome.
Experiment #3: Scaling Up
This time, I recruited the help of my newly built dual RTX 3090 rig at home. Now, I could do a lot more training much faster.
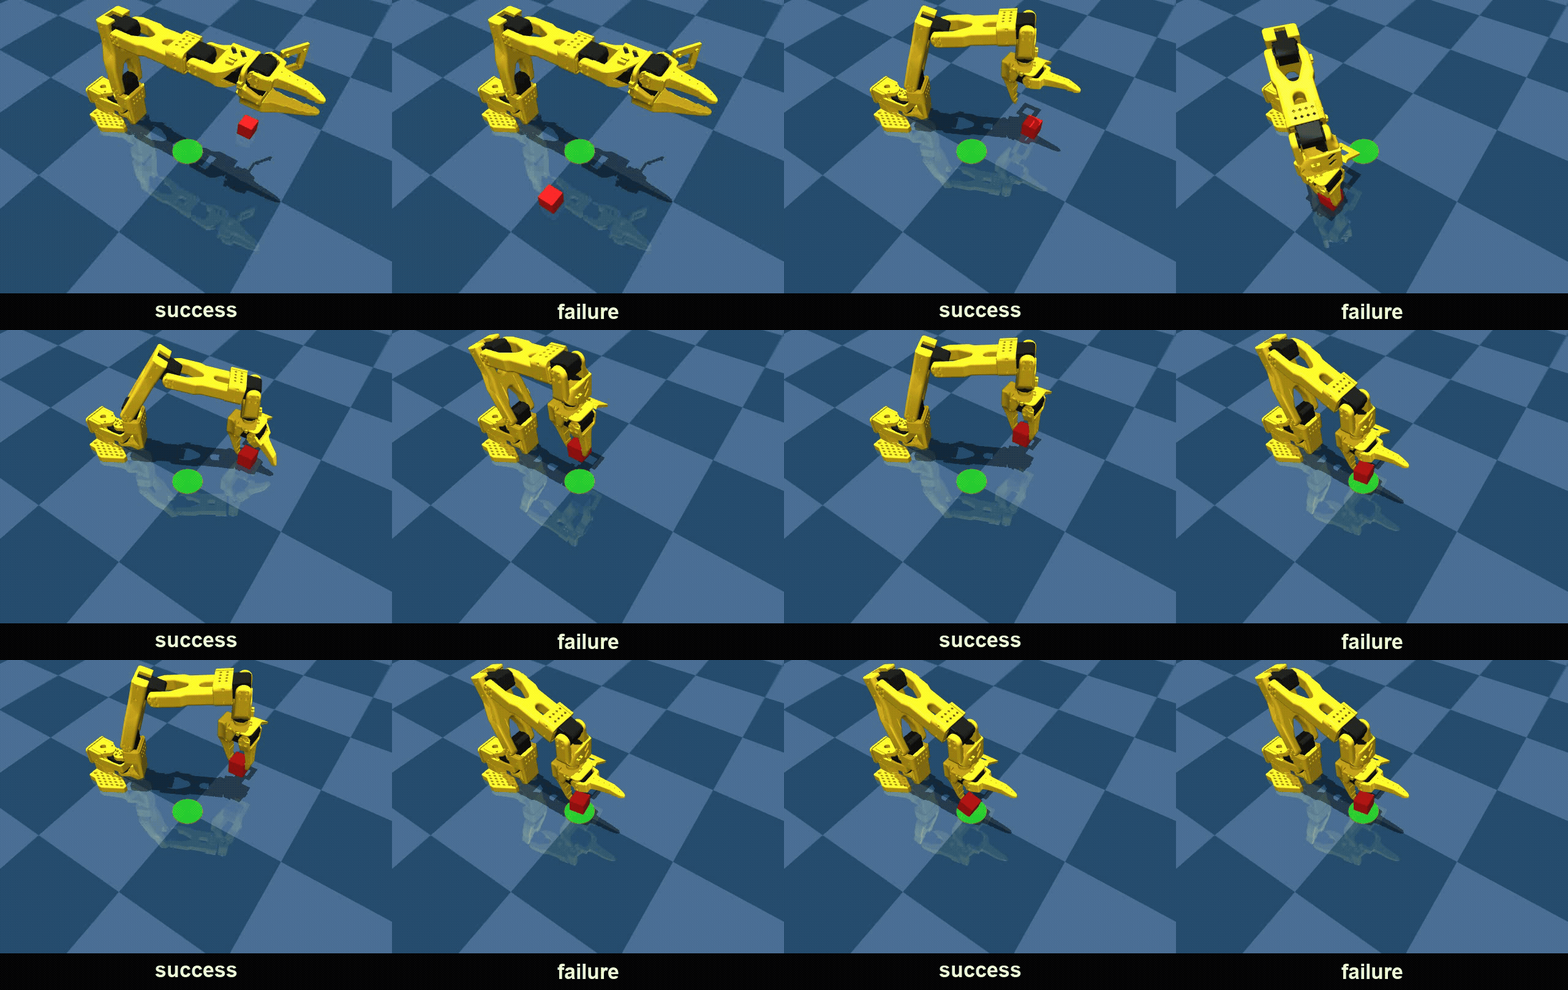
- Dataset: Same as before.
- Training: I bumped it up 50k–>200k updates and batch size 2– >16, which is 4×8 = 32 as many sampled training examples. The dual GPUs helped a lot, but it still took 9.5 hours overnight to train.
- Evaluation: 95/100 this time! When I bumped up the target pad size by 10%, that number shot up to 99/100—near perfect.
- Analysis: This was already great, and I was almost content to stop here except that the successful robot motion was ugly. How so? For one, it was jerky, with far too much acceleration and deceleration. I doubt that'd work out well in real life. Second, it had unnecessarily long waits in between stages, so it took too long to do the task.
So, for the next experiment, I wanted to experiment with better and more diverse trajectories.
Experiment #4: Making it look good
We already had a very successful place rate—now we wanted the robot motion to be more smooth. So I spent some time iterating on the dataset generation itself. I (and by I, I mean I directed Codex to):
- Cut unnecessary non-contact waits by about one-third.
- Smooth out the acceleration and deceleration of the joints. Codex suggested quintic interpolation which sounded 👍 to me
Then I ran, and re-ran, and re-ran the dataset generation, finding multiple issues:
- The IK solver sometimes hit end range motion, resulting in jagged motion. Fixed that by diagnosing it as a stale joint position update issue.
- Found that the fixed lower jaw of the robot passed only 0.27–3.57 mm from the cube before grasp, which was way too brittle for a learned policy.
- The robot was sometimes dropping the cube or having trouble picking it up perfectly, so I suggested a few additions to the final trajectory:
- Added a small 'centering' step as the robot hovers over the cube, to teach the model to align itself perfectly before scooping down to the cube
- When grasping the cube, adding a small approach with the fixed jaw since it was perpendicular to the cube, instead of risking the fixed jaw colliding with the cube
- To avoid disturbing the cube on the way up from the placement on the target pad, we did the same thing as the previous bullet point in reverse, replacing the “drop and end” with supported placement, release, clearance away by the fixed jaw, and then retreat.
Here's a before and after of the trajectory:
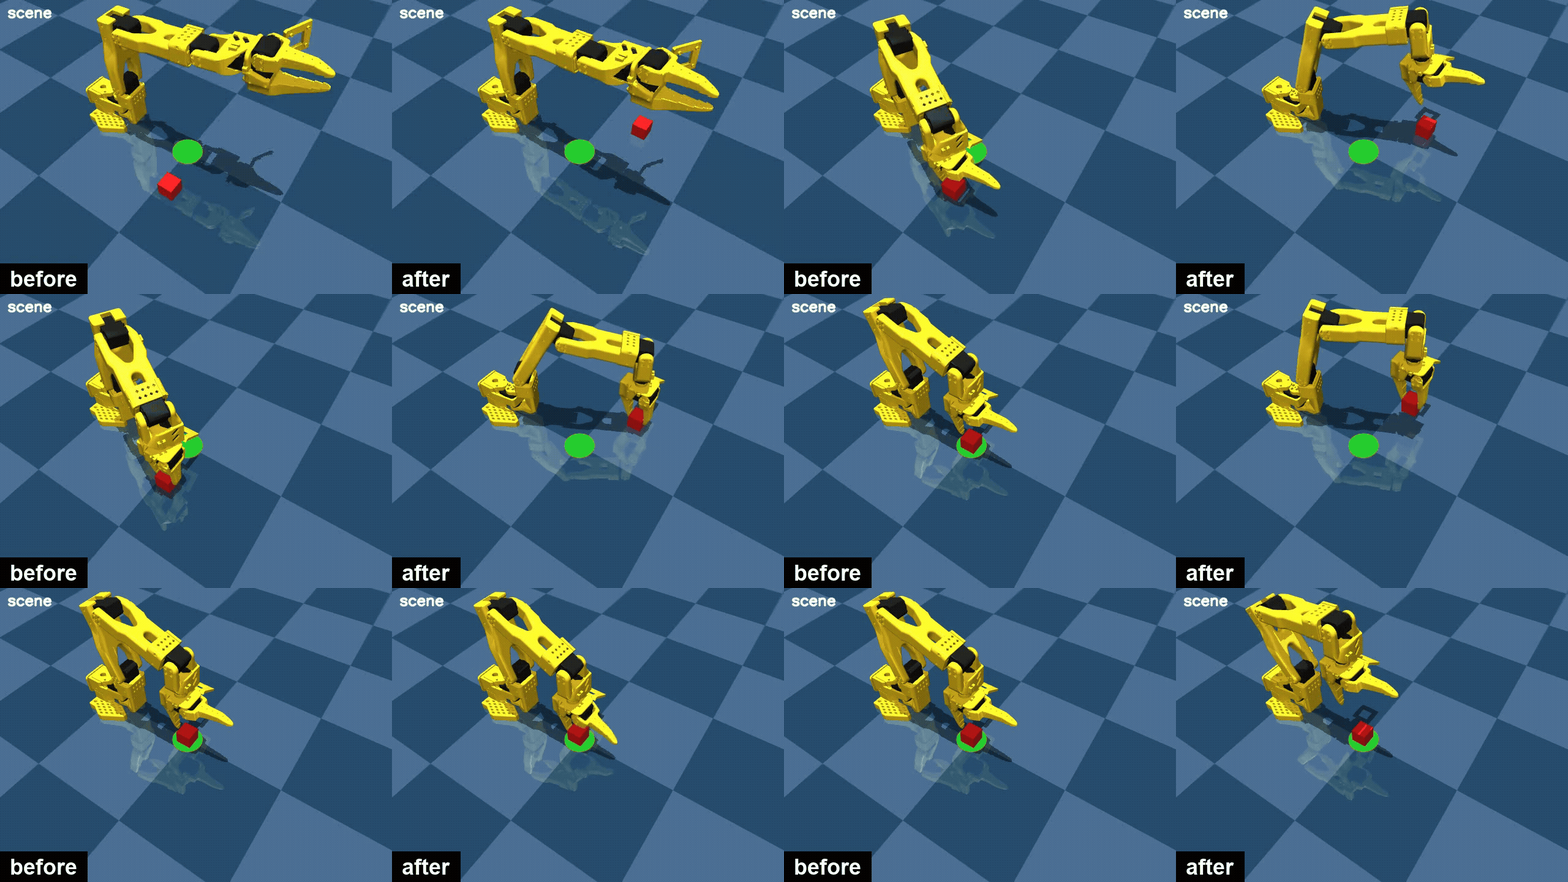
Pretty right? Now it was time to start training.
- Dataset: New and beautiful expert trajectories! I also bumped it up to 1000 episodes so that there would be more demonstrations of the new stages in the trajectories.
- Training: Same as before—200k updates, batch size 16.
- Evaluation: 99/100 this time! So the new trajectories definitely helped. Here's what the final policy looked like on the robot:
Lessons
- AI (I mainly used gpt-5.6-terra via Codex) was a boon, but still needed oversight.
- The good: It supervised my training runs, took care of filling in sensible values for training hyperparameters, corrected many of its own errors, presented hypotheses for me to say yes/no to, and edited all of the visual media in this post.
- The bad: It still needed babysitting.
- Sometimes it'd hit usage limits overnight in the middle of a multi phase plan, stranding itself.
- It would do things very inefficiently sometimes. For example, it was taking way too long to generate data—when I poked it to dig further, it turns out it was using a method that didn't take advantage of the big GPUs in my computer, and fixing those 20x'd the speed of data generation.
- Other times, it just made poor decisions. For example, it overindexed on the camera being an issue for the experiment #1 baseline, when it was actually the dataset generation errors it made.
- It's been a while since I'd gone into the weeds with machine learning—even concepts like batch size took me a while to remember. Time to brush up.
- Writing this blog post took a long time. I need to come up with a better recipe for writing shorter blog posts so this doesn't feel like a burden in the future.
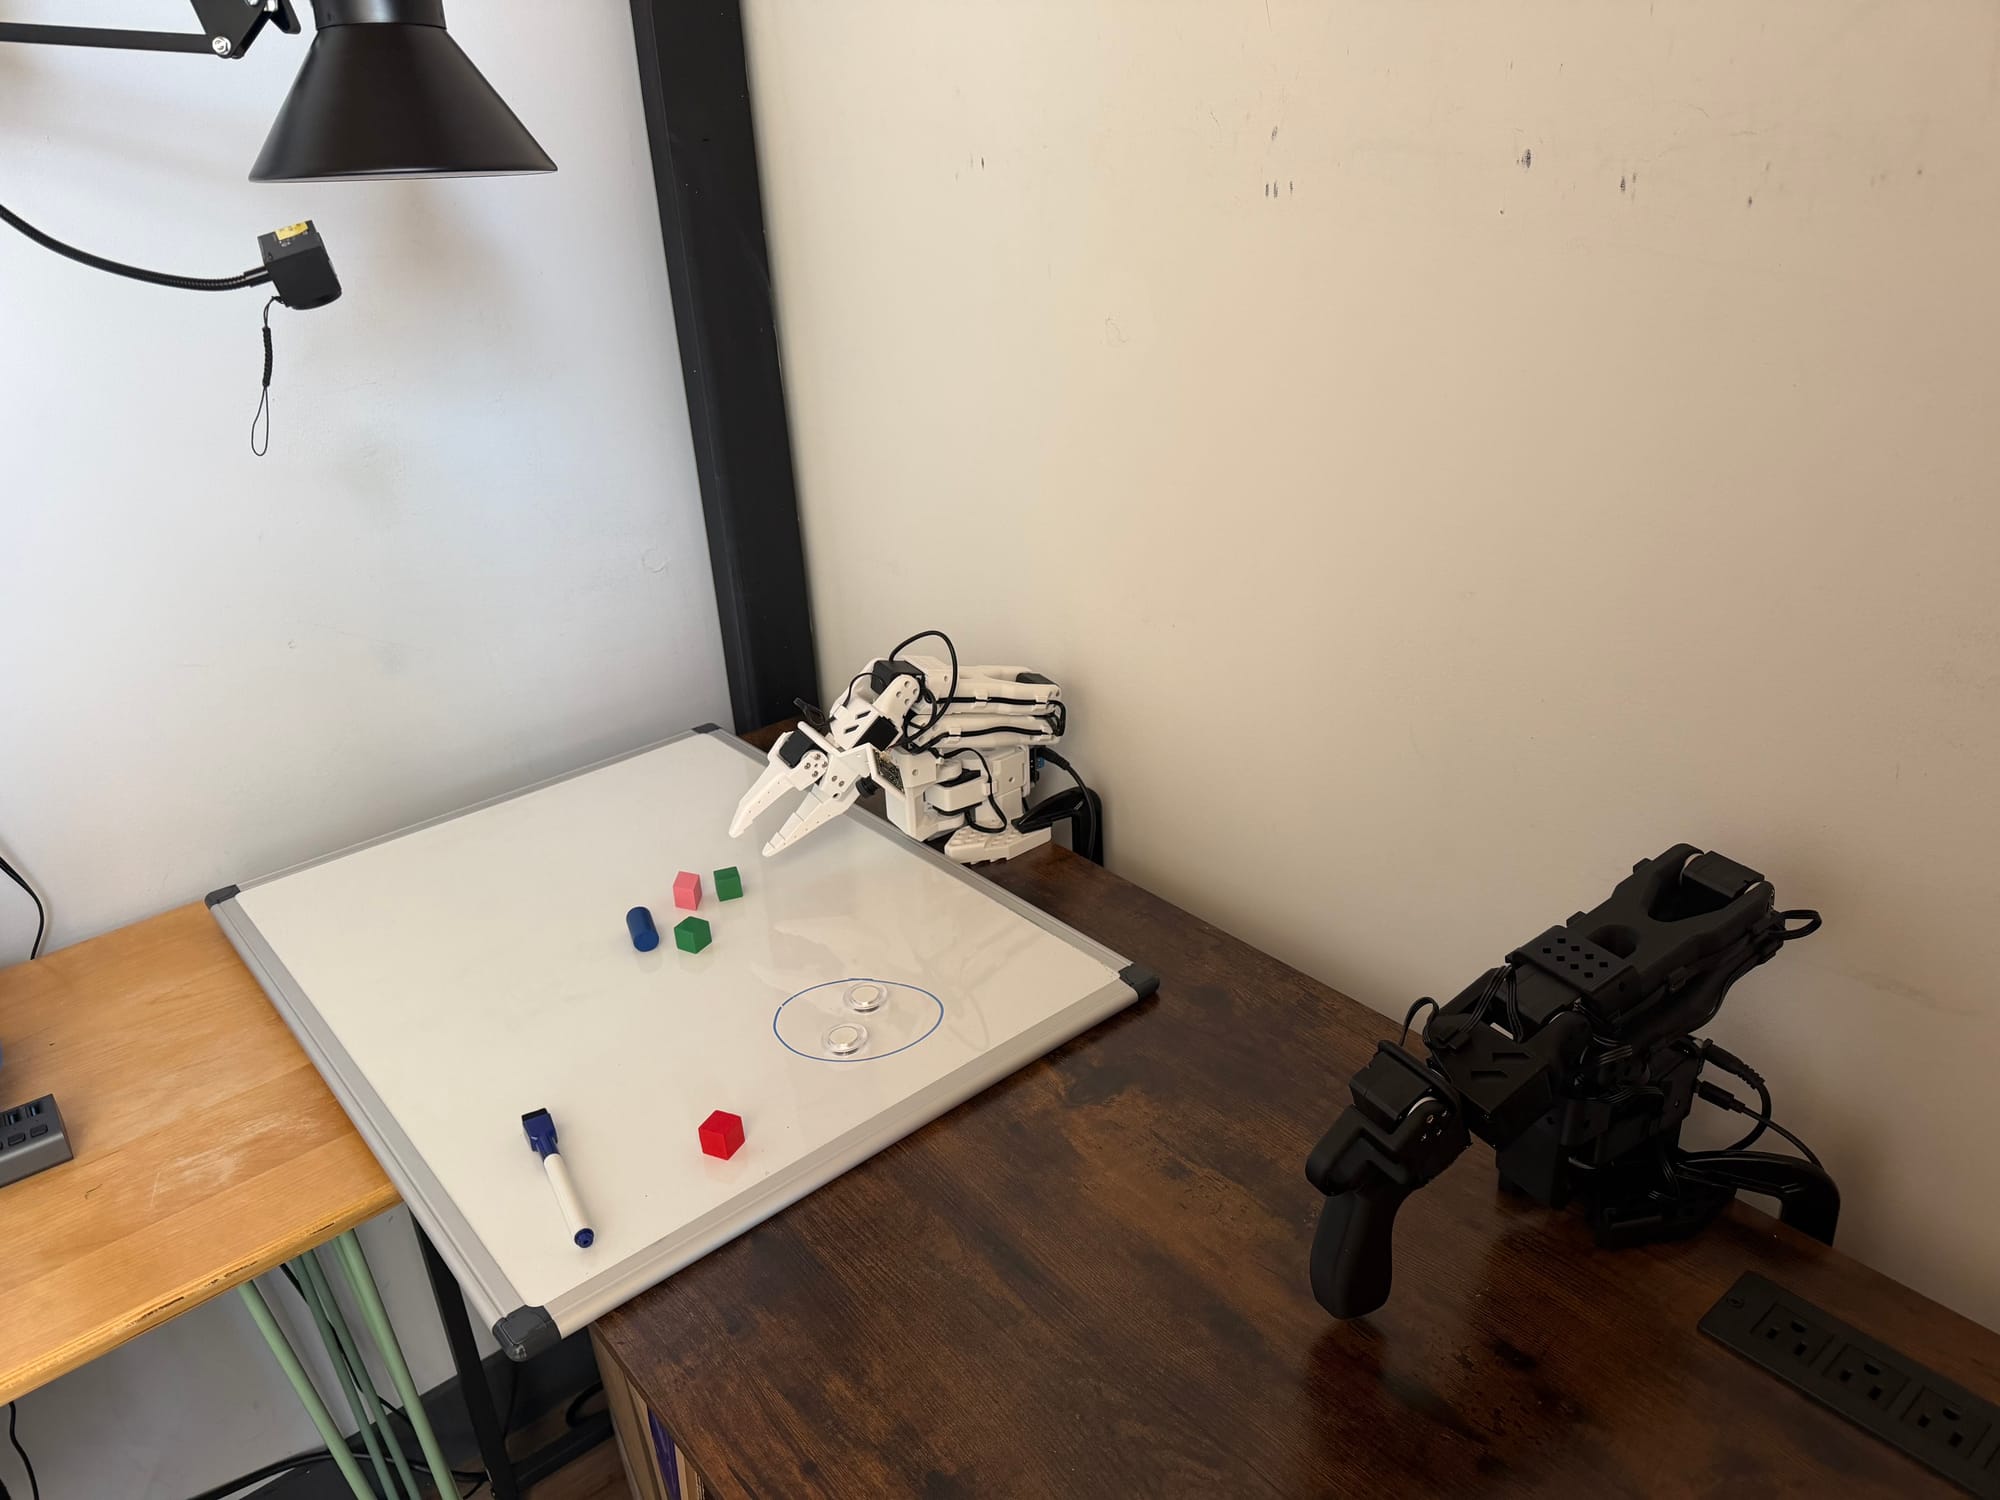
Overall, I'm really happy with the outcome of this experiment. Staying in sim isn't that exciting... but guess who just got a physical robot arm?
Member discussion