How to build a local AI workstation
As teenage Aamir knelt on the living room floor with components spread askew, he felt like a doctor about to perform surgery. Carefully, anxiously, he installed each computer part organ into the computer case cadaver, careful not to let static shock leave his patient in eternal slumber. Eventually, the moment of truth was nigh, and he held his breath as he pressed the power button. The hard disk purred to life, the BIOS menu flashed on the screen, and he exhaled with relief: His computer had come to life.
Building a computer was one of my favorite memories of my teenage years. Up until that point, computers were just magic boxes. Press the button, and voila! A playground of games, websites, and word documents on a screen. Building a computer grounded that experience in something real: here is the physical drive where files live, the CPU that executes commands, the GPU that draws it all on the screen. Like all who build a previously inscrutable contraption from scratch, I graduated from simple delight to the satisfaction of understanding. It was an experience that would define my journey into the world of engineering.
15 years later, I never became a surgeon (that honor belongs to my brother), but as I installed the final component into my workstation, I did actually bring a genius to life on my desk.
Read on, and you'll learn how to do the same.
Why I built this
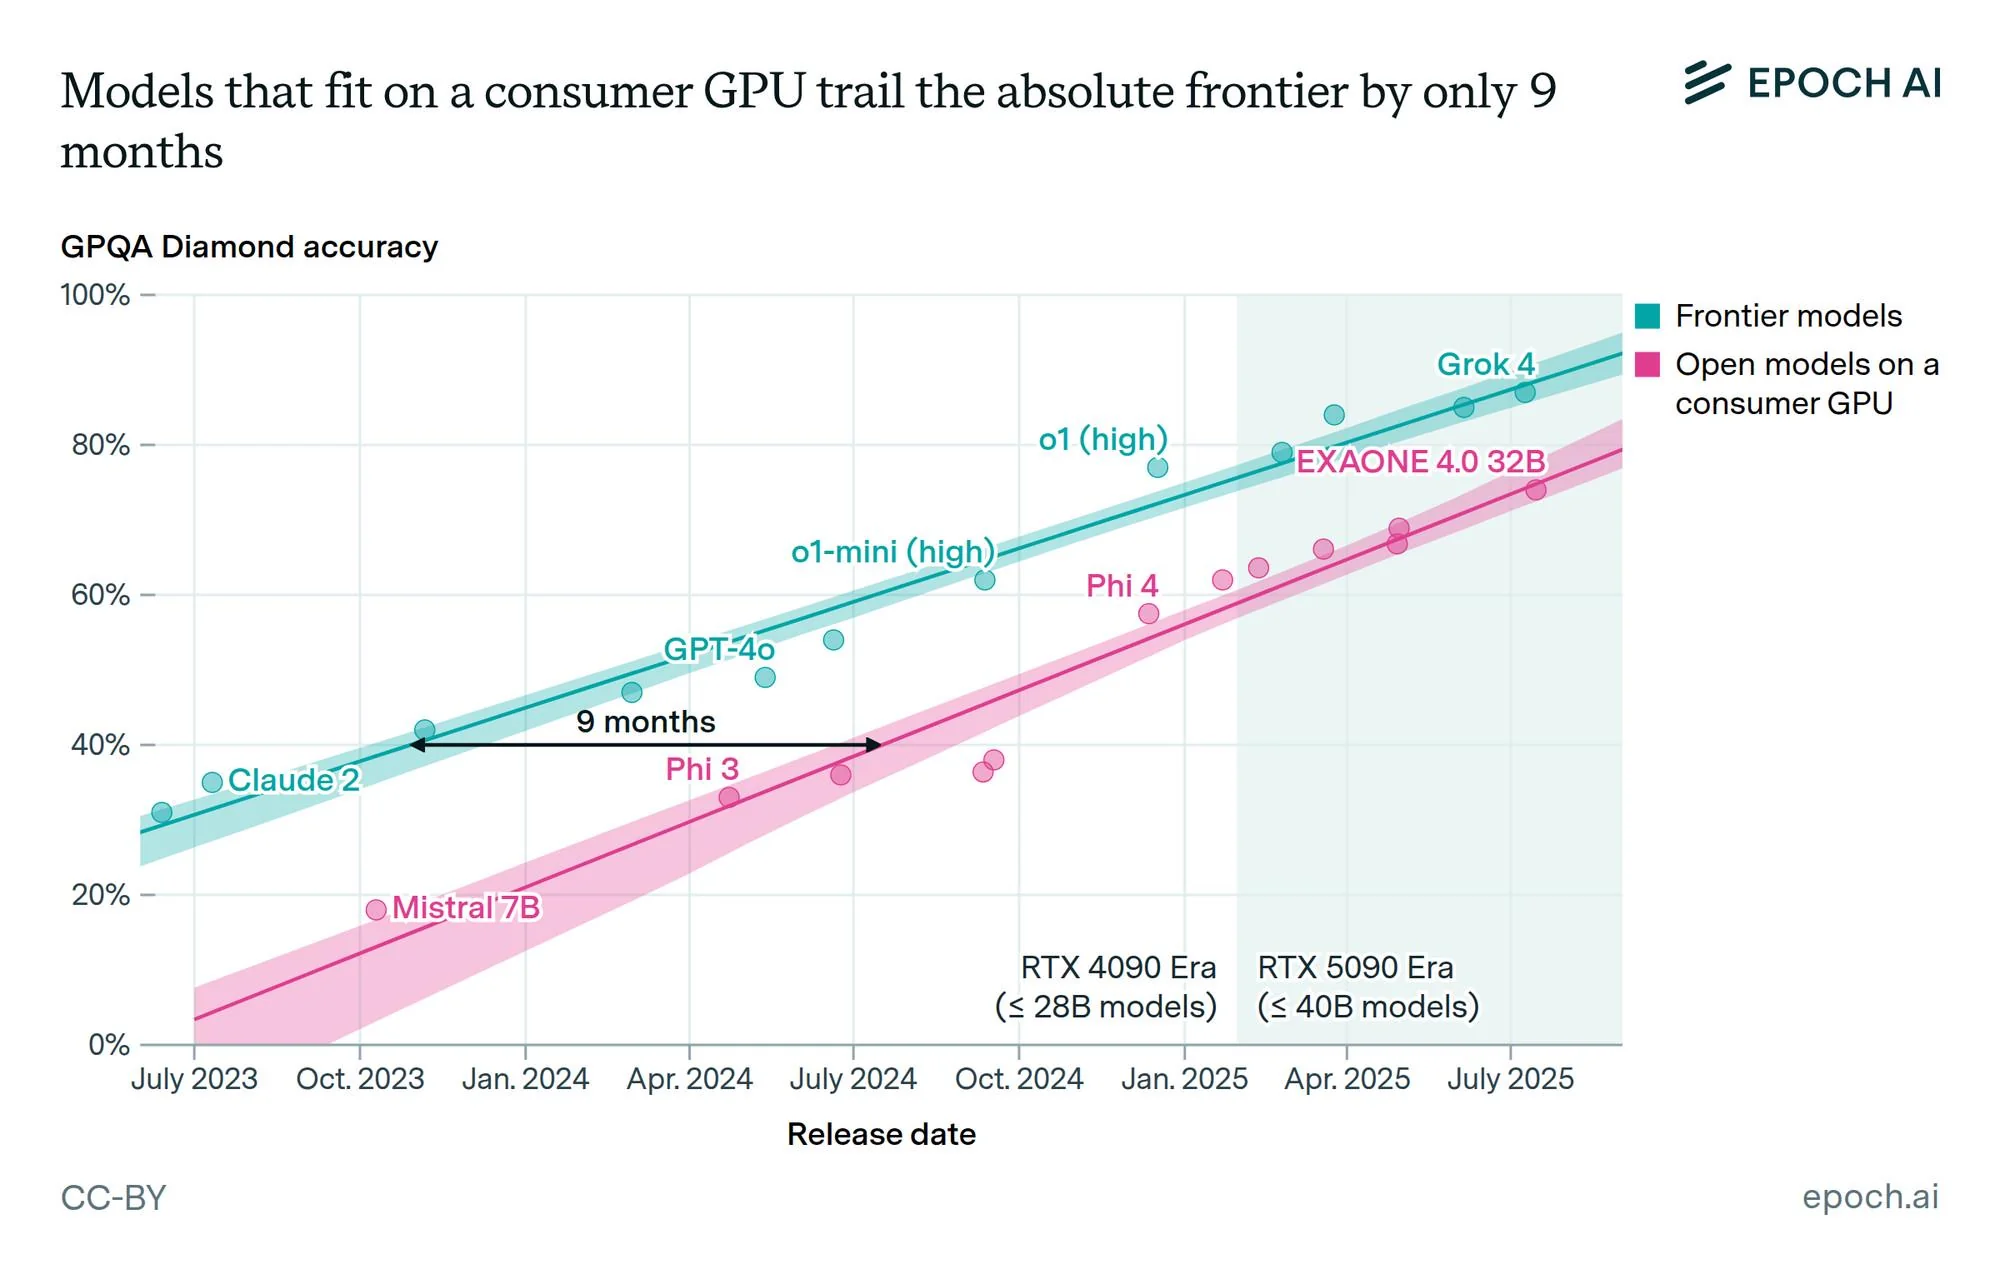
AI models that required datacenters a few months ago (Opus 4.6, Feb 2026) are less capable than models that fit on a gaming PC today (Qwen3.8-27B, August 2026). We haven't reached the ceiling of how much intelligence can fit into a unit of compute. All signs point to this trendline not just holding steady, but accelerating.
Learning was the most important goal with this investment. As an engineer working in AI, I wanted to build empathy for how AI compute is built and created by experiencing firsthand the pain of acquiring and assembling its components. Beyond that, I also wanted to learn how to train my own models locally. Remember my robotics ACT model training? Trained completely locally on this workstation!
Cost is not an issue. At the time, the final cost felt steep at $3400, but a few months later, the GPUs have already doubled in price, 'paying back' the cost of the rig. Meanwhile, the cost of renting compute keeps rising, and I wanted a home rig to experiment freely on without that anxiety.
On a more abstract level, I think there's a strong chance that models will be censored or completely gated in the future. There are several reasons I believe this, but it's beyond the scope of this post—overall, I just wanted to future-proof my access to intelligence.
Most importantly, I now have a mini-genius on my desk. I can learn to train my own mini-geniuses on my desk. And you can also have a mini-genius on your desk. Let's get into it.
What I Bought (and why)
The components for building an AI workstation are no different than any other desktop computer, though you'll notice that one component in particular is priced much higher than the rest.
- Motherboard — ASUS Prime X570-Pro, eBay, $245 — one of few boards that deliver full x8 bandwidth to each GPU PCI-E slot, not the crippled 2nd x4 that many boards hide
- CPU — Ryzen 7 5700X, eBay, $170 — A mid tier CPU with plenty of horsepower for data orchestration and data loading. GPUs do the real work.
- CPU Cooler — ARCTIC Freezer 36, Amazon, $31 — Air cooling sufficient for a 65W CPU.
- RAM — 64GB DDR4 @ 2133mhz, eBay, $299 — More than sufficient for any model offloading
- SSD — 2TB NVMe, Amazon, $278 — chose 2TB over 1TB specifically for robotics data volume (video/sensor demonstration data, sim rollouts)
- HDD — 12TB, Amazon, $390 — I expect to own a portfolio of models that will be loaded into my computer at any given time, and I wanted the headroom
- Case — NZXT H5 Flow, Amazon, $80 — GPU clearance margin, well-reviewed airflow (BUT NOT ENOUGH! details to follow...)
- PSU — Montech Century II 1200W, Amazon, $110 — GPUs are power hungry and it's best to have headroom
- GPUs — 2x RTX 3090s, Craigslist, $900 each. 3090s are the best VRAM/$ ratio (with decent memory bandwidth) that exists on the market right now. That was a steal at current prices: A single 3090 today, Sept 27, goes for $1500-$1900 on eBay, and I only expect that price to go up.
- Total: ~$3400
The gang runs into a problem...
There are dozens of guides online for how to assemble a computer from parts, so I won't bore you with those details. Instead, I'll focus on the one problem I ran into while building this workstation.
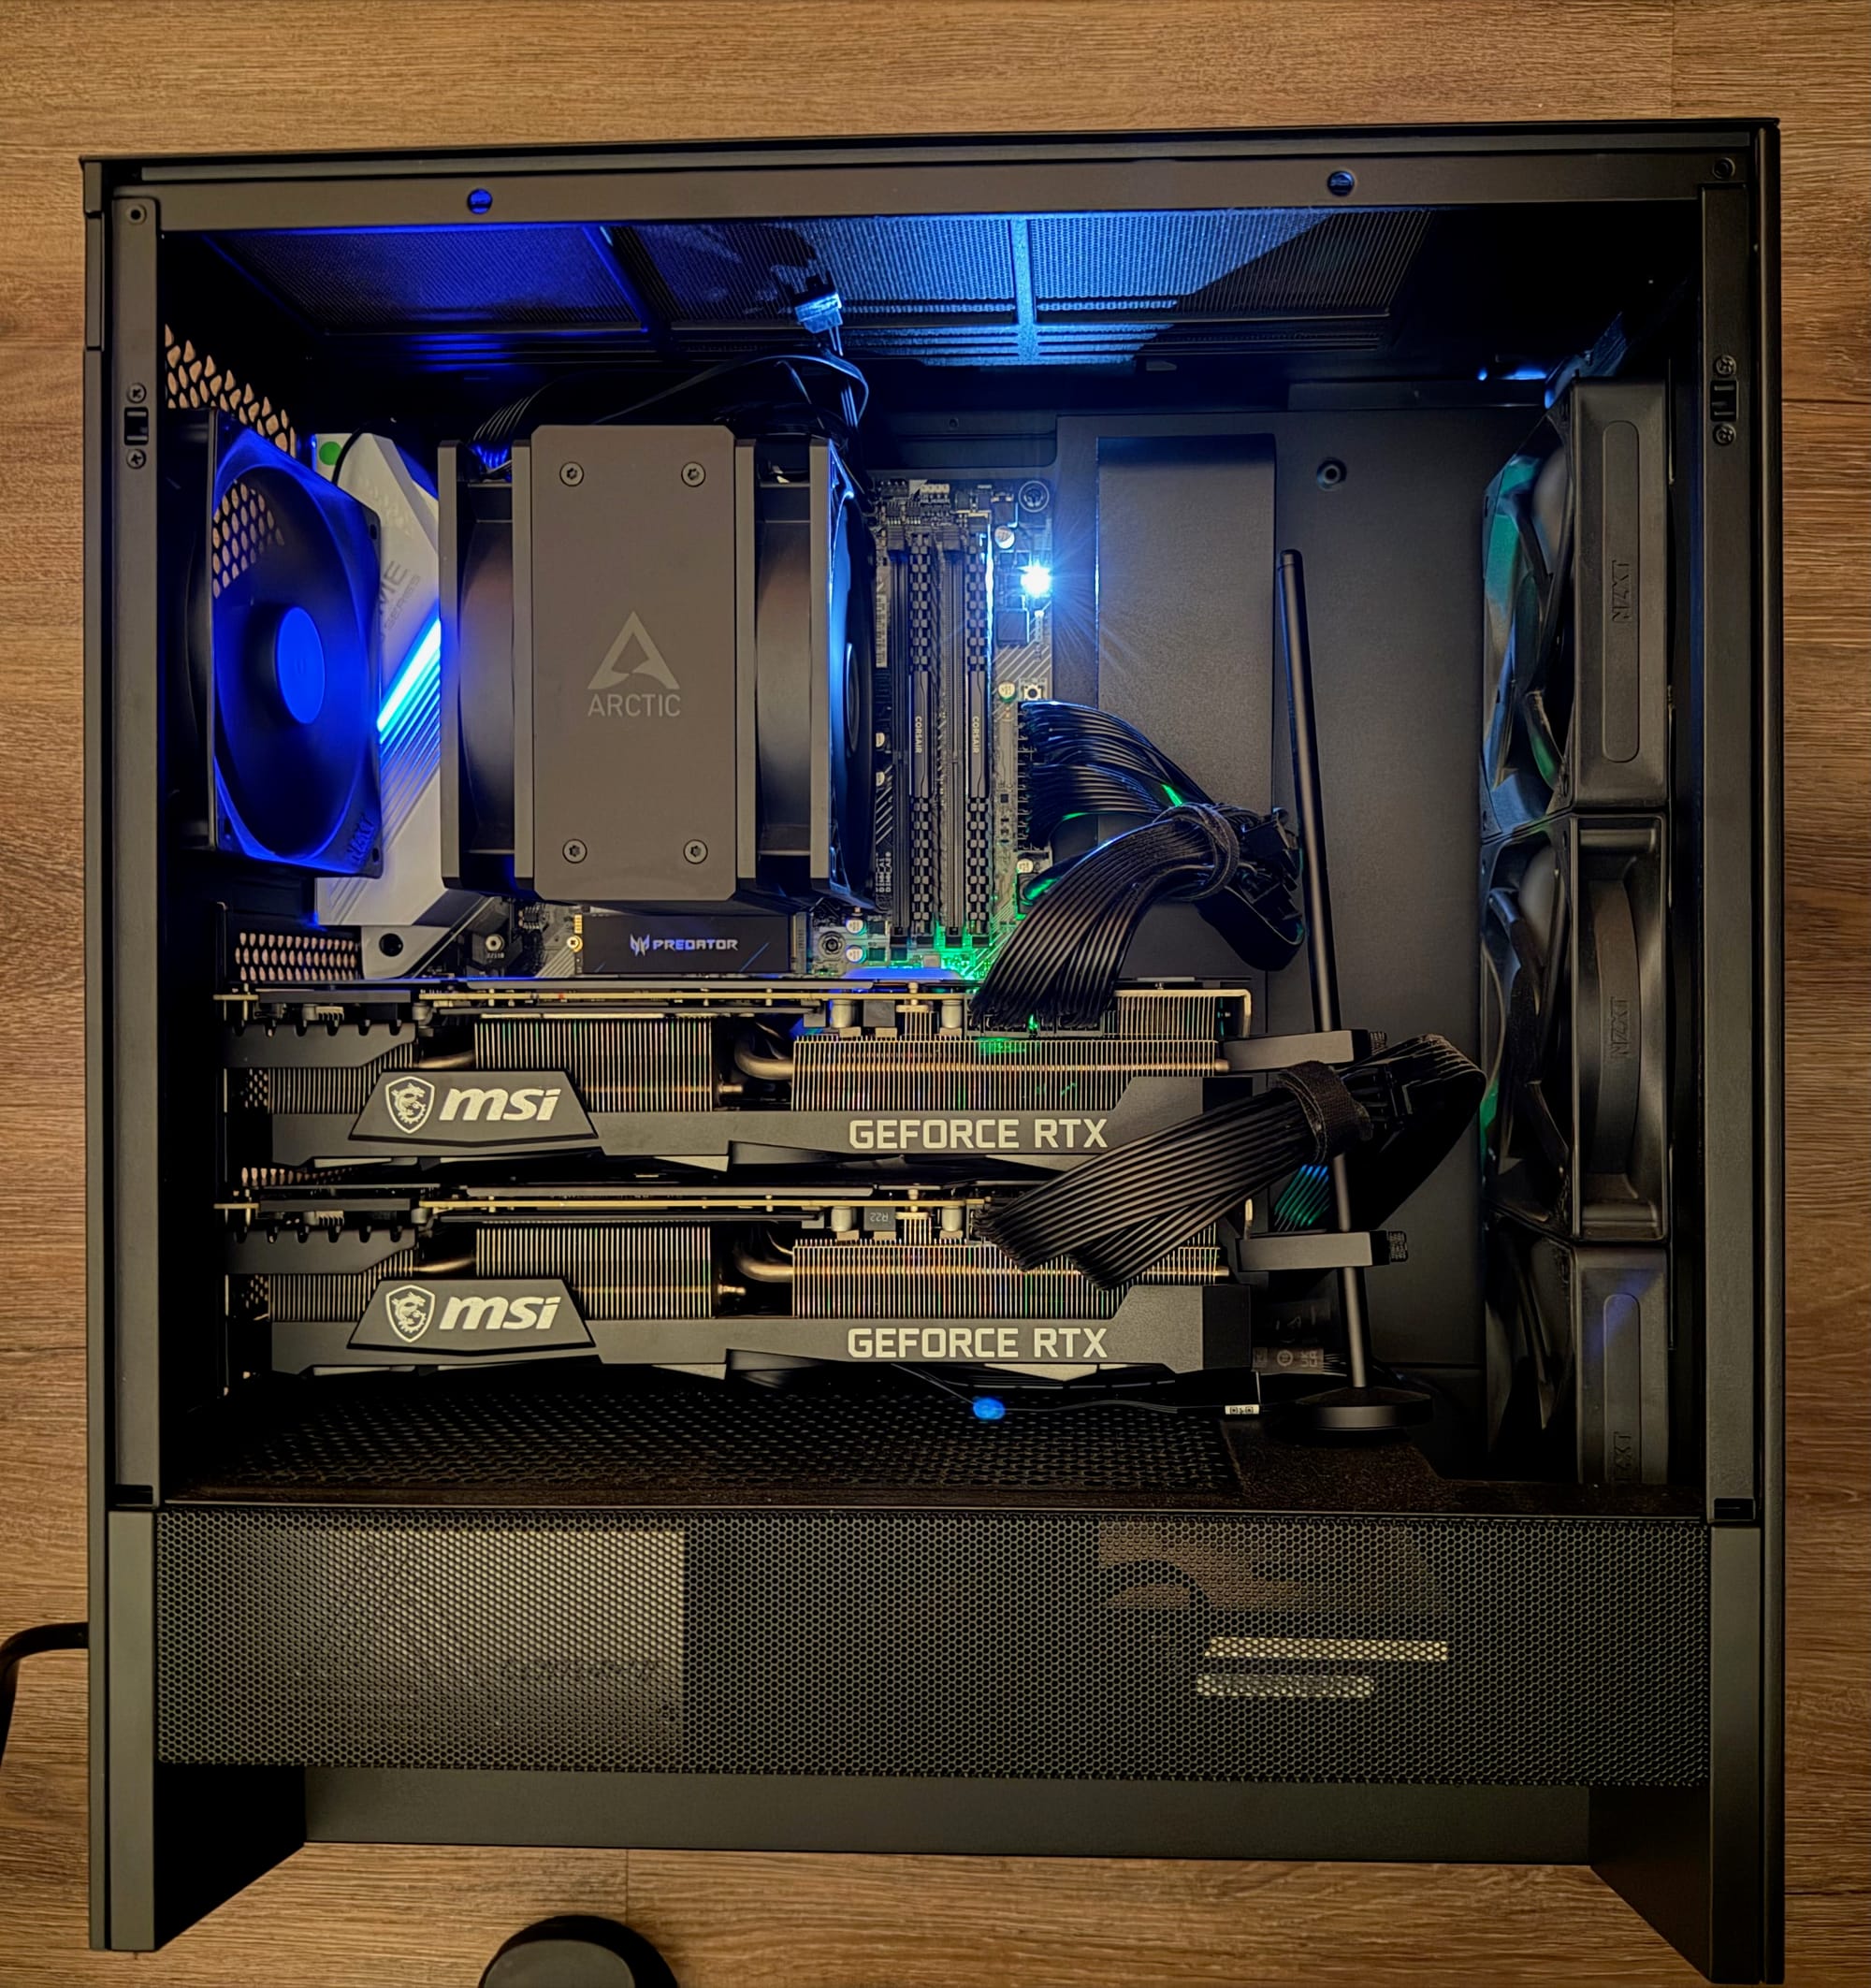
Because I'm running two beefy GPUs on a normal motherboard, they ended up sandwiched on top of each other. This poses a heat problem.
The fans on GPUs are meant to draw heat away from the heat-sensitive electronic components, but it's not possible to do that properly if there's another GPU ~4mm in front of the card. This also affects the bottom GPU—with hot air being pushed directly into its backside, it also gets excess heat. This meant that in order to keep the GPUs running safely, I had to power limit both cards to keep the heat down.
Maximizing power to the GPUs (aka performance) while keeping both below the 88°C threshold was a dual constraint maximization problem. Thankfully, I had Claude Code write up a script that swept through different power settings with max GPU burn, and it found that 230W (upper GPU) / 250W (lower GPU) was optimal. The max per GPU is 350W, which translated to about 20-30% performance left on the table. The exact pains I was hoping to build empathy for, btw.
If I could do it again, I would invest in a larger case (like the Enthoo Pro 2 Server V2) and a vertical mount for the second GPU, so they would not have to be sandwiched next to each other. See the example below!
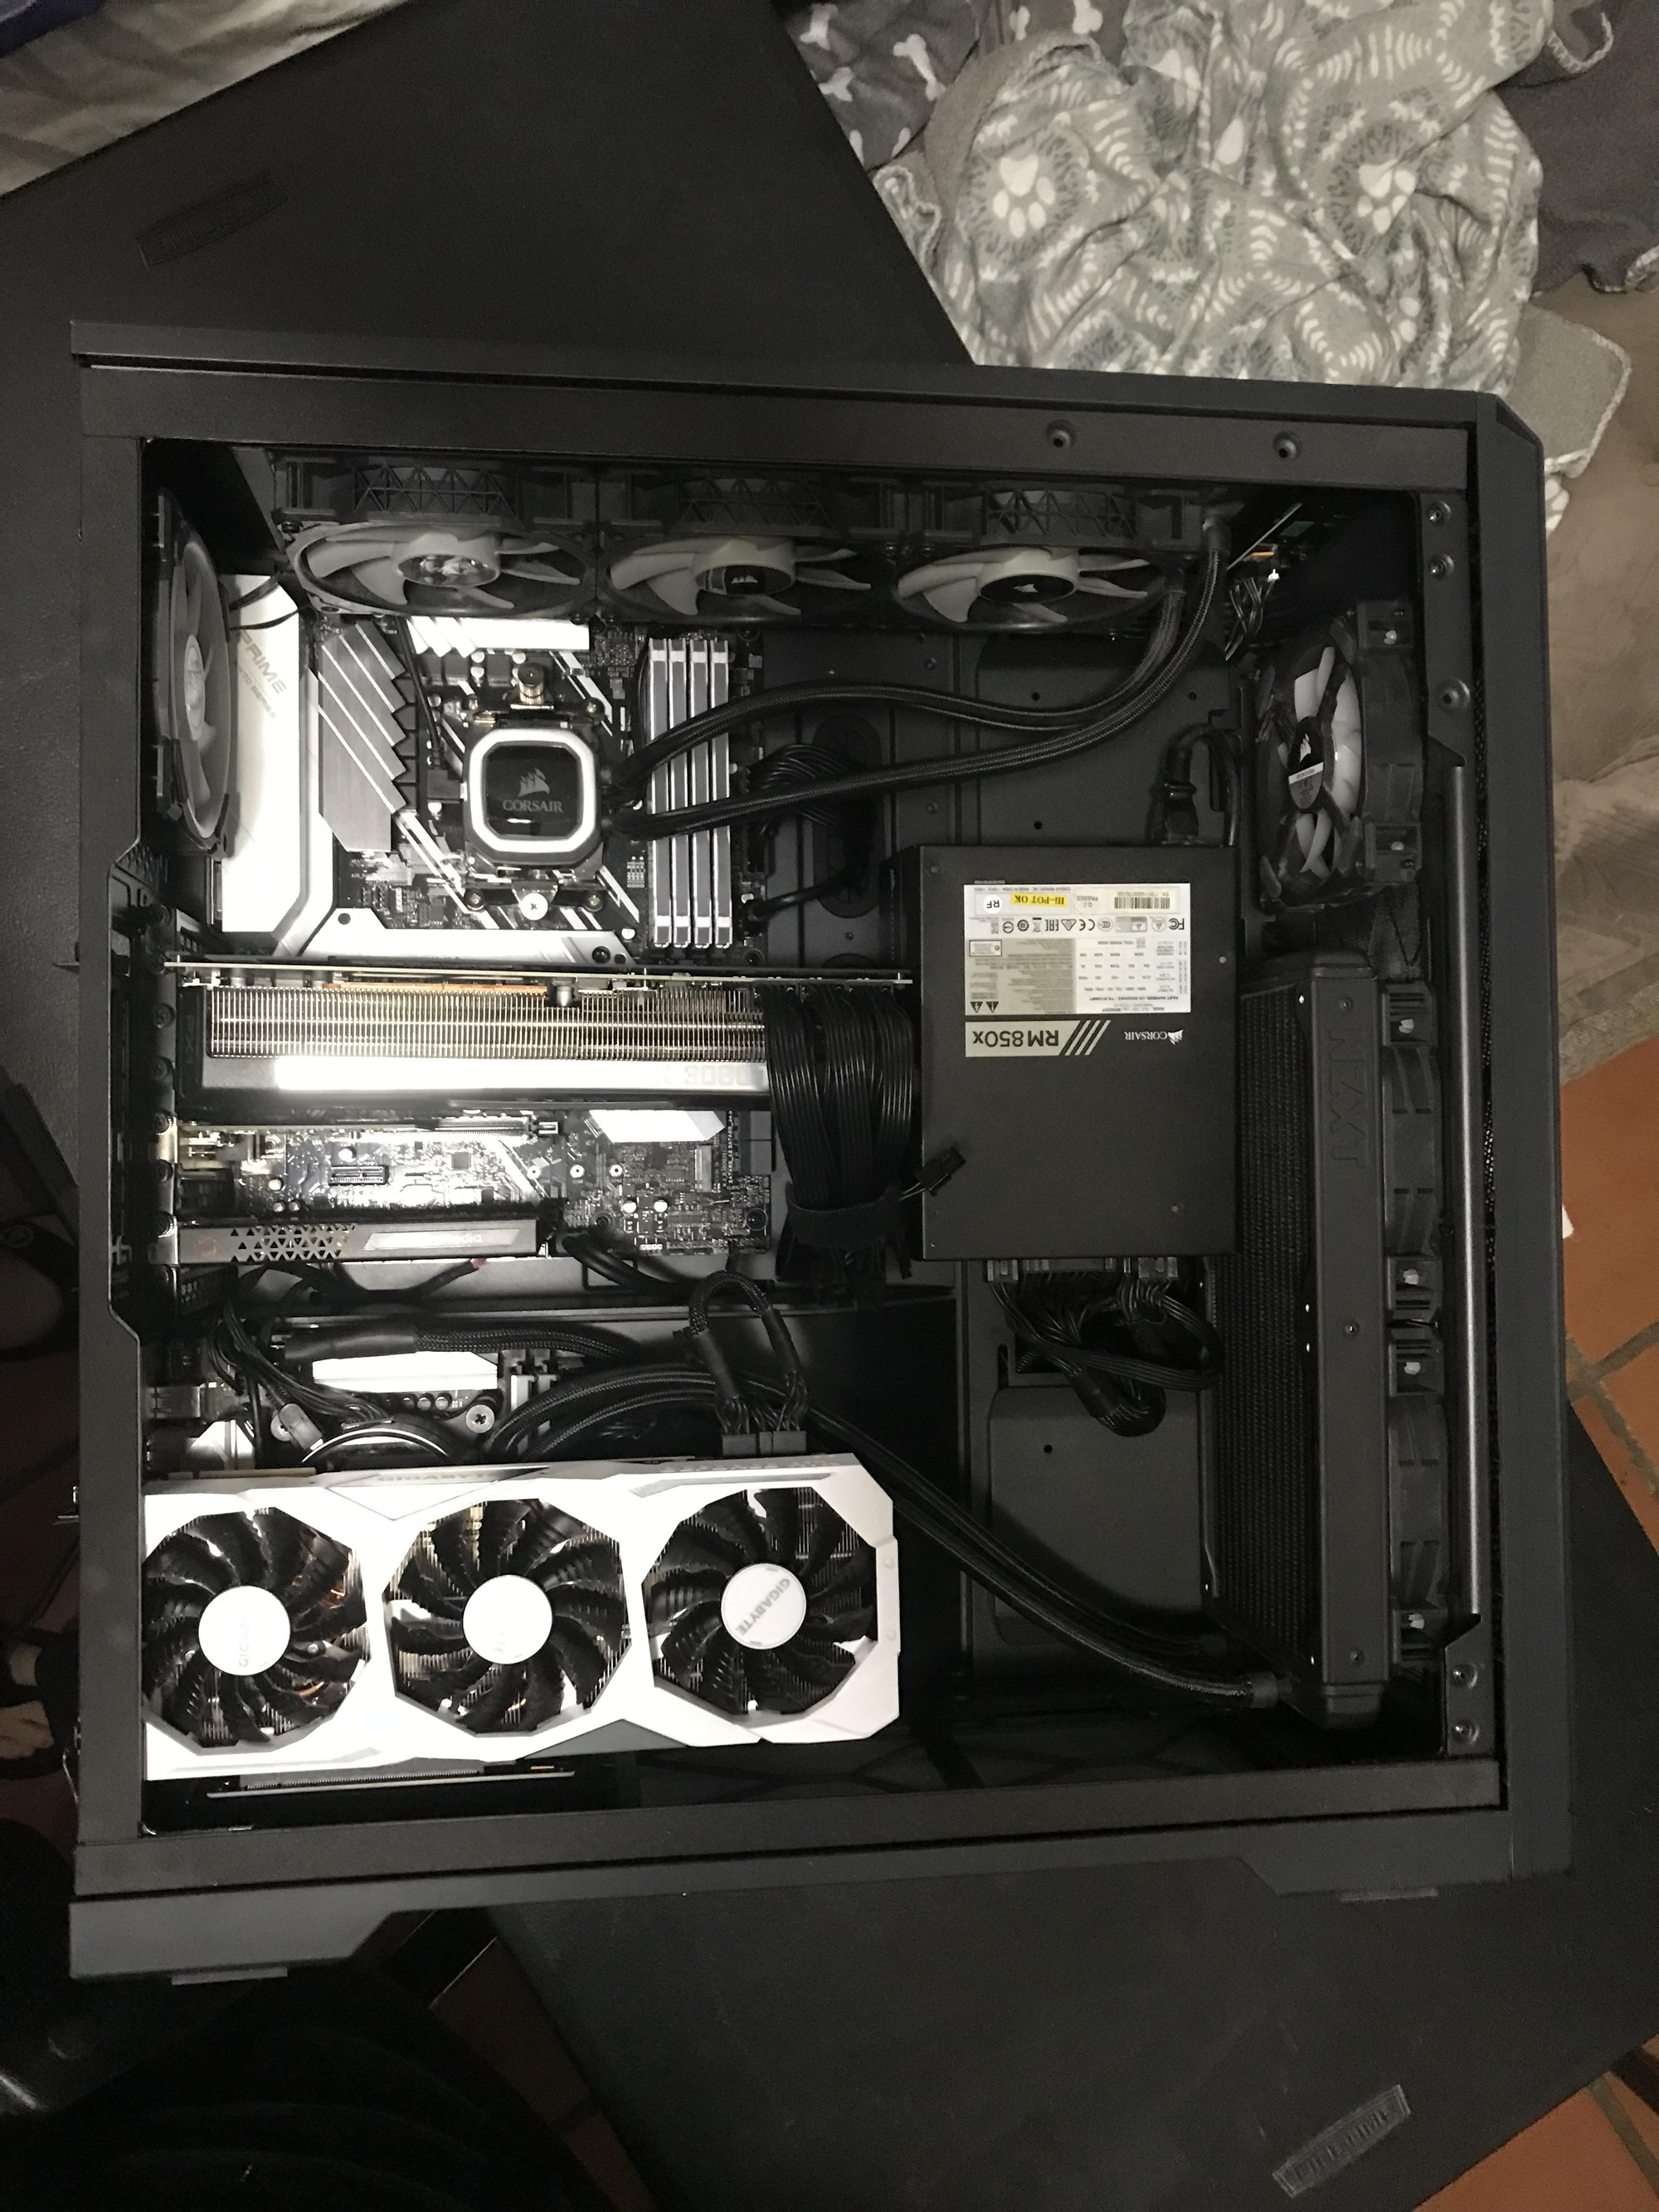
Most training jobs I run are overnight and the inference speeds on models I are about are fast enough, so it didn't matter too much in the end.
Conclusion
Was this absolutely a necessary purchase? Probably not. But it was a great way to build empathy for what it takes to run AI models, and I now have a platform to learn and use AI independently. Side benefit: I can run GPU heavy programs like Blender for modeling 3D printable parts. And I'm definitely not going to use this to play AAA games on cold wintry days in the near future.
Member discussion